
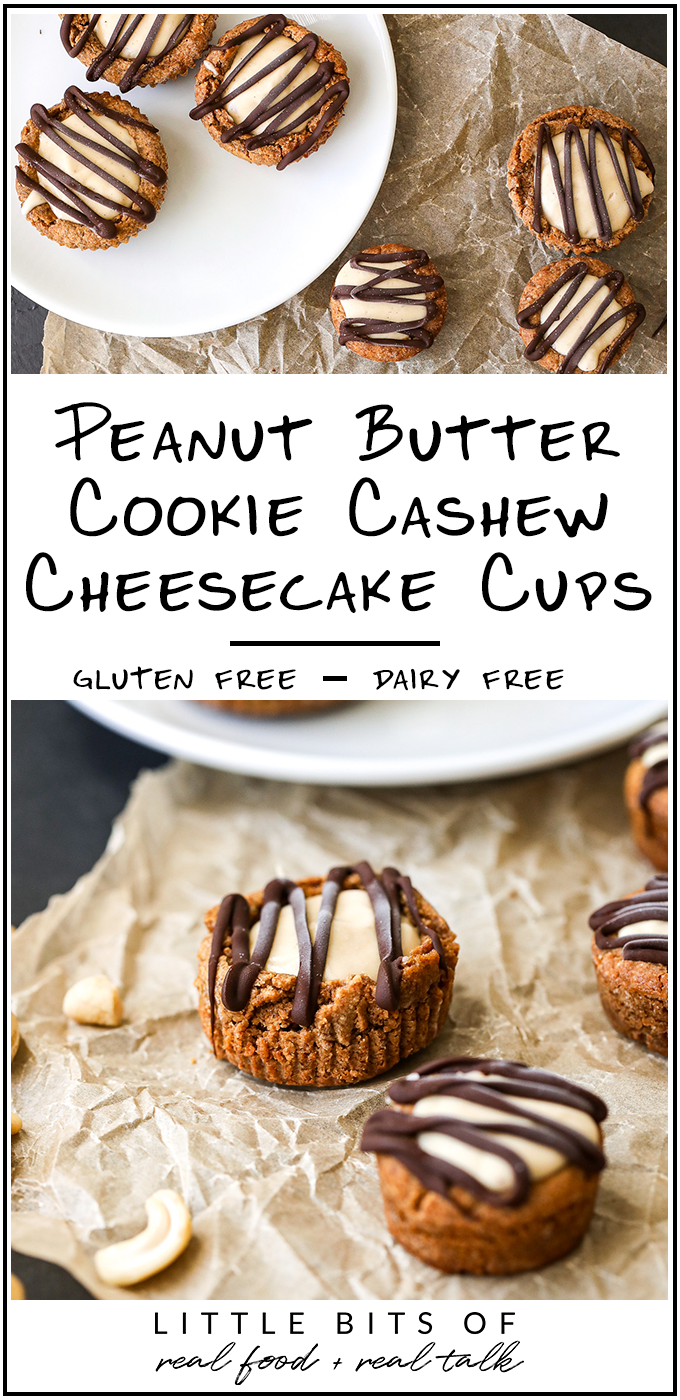
Peanut Butter Cookie Cashew Cheesecake Cups
on Feb 10, 2021, Updated Jul 31, 2025
We are participant in the Amazon Services LLC Associates Program, an affiliate advertising program designed to provide a means for us to earn fees by linking to Amazon.com and affiliated sites. Please see my disclosure policy.
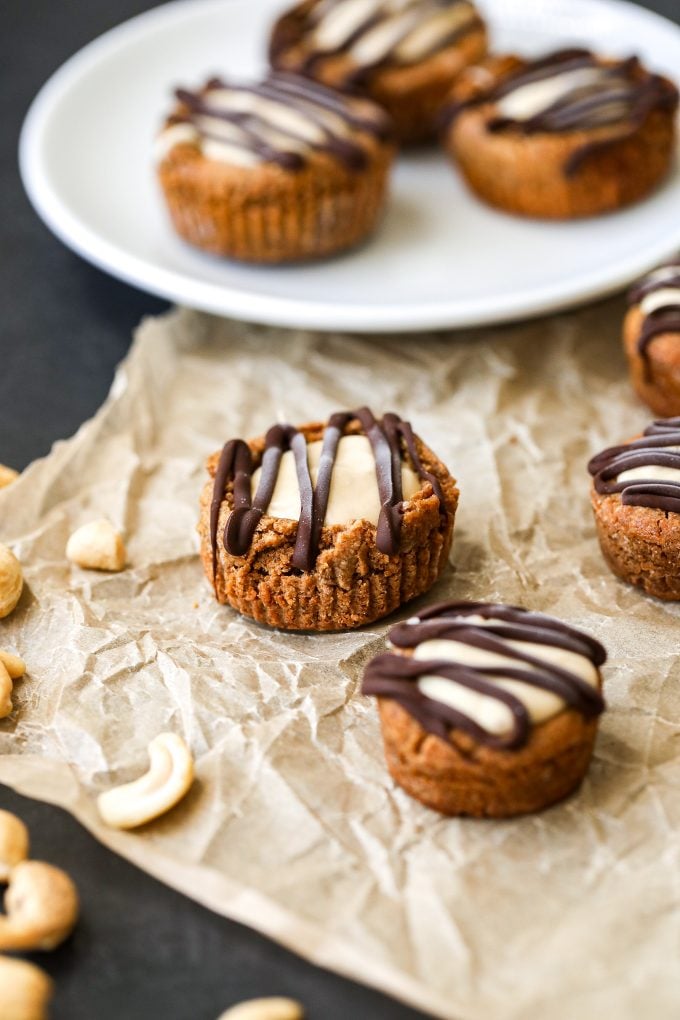
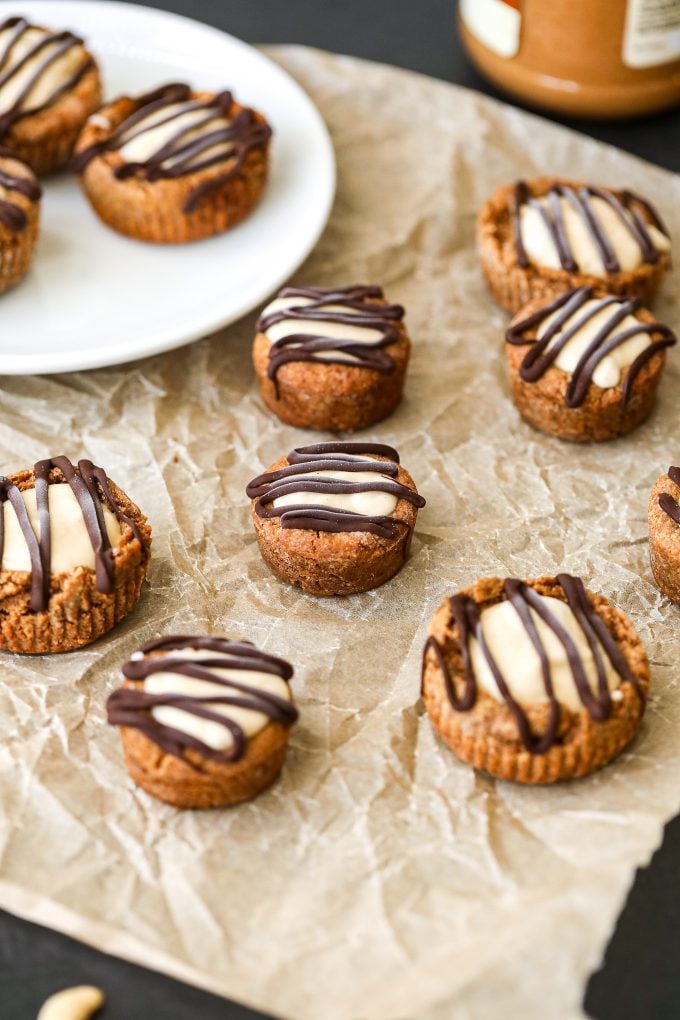
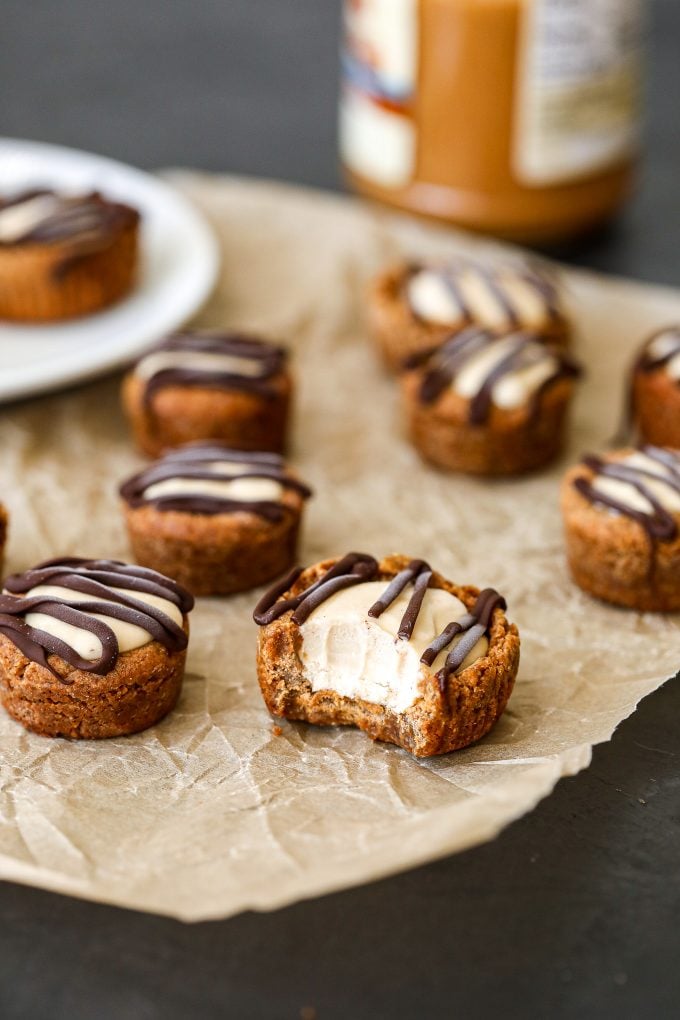
Yep you read that right – Peanut Butter Cookie Cashew Cheesecake Cups. These little cups are SO tasty and rich and perfect for any dessert craving! I love that they are a freezer treat because that means you can keep them in there for awhile and always have them on hand.
Making cheesecake out of cashews might seem insane to you, but trust me, it’s amazing. The most important part is soaking your cashews for long enough and using a high powered blender to get them super smooth. Making the peanut butter cookie part of this recipe is also insanely easy as it is only a few ingredients. You bake them in the cups, then when they are still hot, press down the center to create a cup! Once they cool, just pour the cheesecake filling into each and freeze. A little chocolate on top just makes them that much better. These are great to make for valentine’s day and impressive someone special!
Ingredient List
- Peanut Butter
- Egg
- Baking Soda
- Raw cashews
- Vanilla extract
- Maple Syrup
- Full fat coconut milk
- sea salt
- Coconut oil
- lemon/ lime juice
- Chocolate chips
We suggest you soak some extra cashews so we can make a few more treats, check these out:
Strawberry Lemonade Cashew Cheesecake Bites
Chocolate Chip Cookie Dough Cashew Cheesecake Bars
Chocolate Stuffed Cashew Butter Cookies
Pin the image below to save these Peanut Butter Cookie Cashew Cheesecake Cups for later!

Peanut Butter Cookie Cashew Cheesecake Cups
Ingredients
- 1 cup peanut butter
- 1 egg
- 1 cup coconut sugar
- 1 teaspoon baking soda
- 1 ½ cups raw cashews
- 1 tsp vanilla extract
- ⅓ cup maple syrup
- ¼ cup full-fat coconut milk
- ¼ tsp sea salt
- 3 Tbsp melted coconut oil, refined for no coconut flavor, you can use light olive oil too
- 2 Tbsp lemon or lime juice
- ½ cup chocolate chips
Instructions
- Start with soaking the raw cashews in a bowl covering them in water for 4-12 hrs.
- Preheat oven to 350 degrees and line a muffin tin with paper liners.
- In a medium bowl combine peanut butter, egg, coconut sugar and baking soda.
- Scoop about 2 tablespoons of cookie dough into each muffin liner and flatten slightly.
- Bake for about 15 minutes or until lightly browned.
- Remove from the oven, then use the bottom of a wooden spoon, or the bottom of a jar of spices to press down the middle of the cookie to make it into a cup. Then let them cool.
- Once the cashews are done soaking drain water and add to a high powered blender or food processor with remaining ingredients except chocolate chips.
- Put cashew mixture in ziplock bag with cut off the tip.
- Once cookies have cooled, squeeze cashew mixture into the cookie cups.
- Put them in the freezer for 30 minutes, then melt chocolate chips in the microwave and drizzle the melted chocolate on top.
- Freeze for at least another hour to harden, then store in a ziplock bag in the freezer.


Do you think you can sub the egg in here with banana or yogurt or applesauce for a vegan option?
Not sure how it will turn out but for sure give it a shot!
This sounds so amazing, I can’t wait to try them.
These are amazing!!!! Easy and fun to make, they taste like heaven, and your family will love you for making them. Awesome recipe that I’ll make again and again. Plus, the idea to put the leftover cheesecake filling on graham crackers…brilliant! It’s like 2 desserts out of 1 recipe.
We love treats!!
So yummy. I doubled the recipe right off the bat because well I knew these would be delish. I soaked 3 cups of cashews and they obviously expand when soaked. So I measured 3 cups soaked and I had one cup left over that I then used for something else. With the 3 cups soaked cashews I had more than enough filling for 24.
Genius!!
Can I sub the Maple Syrup for honey?
Yes!
Wow!!! So so so good. But then again you make some of my family’s favorite baked healthy goods. #nailedit
Eeeekkkk, so wonderful!
I was nervous to attempt this – the photos looked way outside of my comfort level. The instructions were super easy to follow, and the results were delicious! SO good. My drizzling skills could use some work, mine certainly weren’t as pretty as Kelsey’s, but I’m certainly willing to keep trying to make them better! Such a great recipe! Can’t wait to make more!
So glad you tried! Always fun to stretch your comfort level!
My fiancé made these for me instead of buying chocolates for Valentine’s Day. They were PHENOMENAL!! I might note he’s not a natural baker and they came out perfect. He subbed natural almond butter since I cannot eat peanuts and it’s so good! Thanks for the recipe!
Love a fiancé in the kitchen!
So tasty! Made these for Valentine’s Day and were so excited to try them. We were not disappointed. They were so good. Now I’m trying not to eat all of them in one sitting!
That’s the hardest part of the whole recipe!
These are so delicious and easy! I’m usually a little iffy about recipes with cashew cream type stuff, but these are amazing. The hubs loves them too!
We still have a few stores in the freezer and I’ll just pull one out and let it sit for about 5-10 minutes before eating. So perfect!
Great job reaching out of your comfort zone!